
728x90
SMALL
1. 개요
현대 소프트웨어 개발에서는 지속적 통합(Continuous Integration, CI)과 지속적 배포(Continuous Deployment, CD)가 필수적인 요소다.
특히, GitOps 방식은 Git을 단일 소스로 삼아 배포를 자동화하는 접근법으로, ArgoCD와 GitHub Actions를 활용하면 EKS(AWS Elastic Kubernetes Service) 환경에서 강력한 CI/CD 파이프라인을 구축할 수 있다.
본 글에서는 EKS 생성 과정, ArgoCD 생성 과정, GitOps 기반의 CI/CD 파이프라인을 구축하는 과정을 설명하고,
구체적인 코드 예제를 포함하여 실무에서 적용하는 방법을 상세히 다룬다.
2. 사용 기술 및 아키텍처
사용 기술
| EKS (Elastic Kubernetes Service) | AWS에서 제공하는 Kubernetes 관리형 서비스 |
| GitHub Actions | GitHub에서 제공하는 CI/CD 자동화 도구 |
| ArgoCD | GitOps 방식으로 쿠버네티스 애플리케이션을 배포하는 도구 |
| Helm | Kubernetes 애플리케이션 패키지 관리 도구 |
| Docker | 컨테이너 이미지 빌드 및 배포 |
| AWS ECR (Elastic Container Registry) | Docker 이미지를 저장하는 AWS의 컨테이너 레지스트리 |
| Ingress Controller (ALB) | 외부 트래픽을 관리하는 로드 밸런서 |
CI/CD 아키텍처
- 개발자가 GitHub에 코드를 푸시하면 GitHub Actions가 실행됨.
- GitHub Actions에서 Docker 이미지 빌드 및 AWS ECR 푸시 수행.
- ArgoCD가 변경 사항을 감지하고 자동으로 EKS에 배포.
- GitOps 방식으로 Git과 Kubernetes 상태를 지속적으로 동기화.
[개발자] → [GitHub Commit] → [GitHub Actions 실행]
→ [Docker 이미지 빌드 & ECR Push] → [ArgoCD 자동 배포]
→ [EKS 반영]
요약
| 단계 | 작업 내용 | 실행 위치 |
| 1. EKS 클러스터 생성 | eksctl create cluster ... | AWS CloudShell |
| 2. IAM 사용자 생성 & 권한 부여 | aws iam create-user | AWS CloudShell |
| 3. ECR 생성 (EKS 클러스터 이후 실행) | aws ecr create-repository | AWS CloudShell |
| 4. ECR 로그인 테스트 | aws ecr get-login-password | AWS CloudShell |
| 5. Docker 이미지 빌드 & Push | docker build, docker push | AWS CloudShell |
| 6. GitHub Actions 설정 (자동화) | .github/workflows/deploy.yml | GitHub |
| 7. ArgoCD에서 배포 확인 | argocd app sync my-app | AWS CloudShell |
| 8. Kubernetes 자동 배포 설정 |
1. EKS 클러스터 생성
1️⃣ AWS CloudShell에서 EKS 클러스터 구축
eksctl create cluster \
--name my-eks-cluster \
--region ap-northeast-2 \
--nodegroup-name eks-nodes \
--nodes 2 \
--nodes-min 1 \
--nodes-max 3 \
--node-type t3.medium \
--managed

시간이 좀 걸린다
cloudformation stack "eksctl-my-eks-cluster-nodegroup-eks-nodes" 생성
2️⃣ EKS 클러스터 확인
aws eks list-clusters --region ap-northeast-2
kubectl get nodes
aws eks describe-cluster --name my-eks-cluster --region ap-northeast-2 --query "cluster.status"3️⃣EKS 환경 전체 확인
aws eks describe-cluster --name my-eks-cluster --region ap-northeast-22. IAM 사용자 생성 & 권한 부여
1️⃣AWS CLI 이용 User 생성 / 권한 부여 / Access Key 생성
# 새로운 IAM 사용자 생성 (AWS CLI)
aws iam create-user --user-name sungbin-user
# EKS 관리 권한 부여
aws iam attach-user-policy \
--user-name sungbin-user \
--policy-arn arn:aws:iam::aws:policy/AmazonEKSClusterPolicy
# 새로운 사용자에 Access Key 부여
aws iam create-access-key --user-name sungbin-user
# aws configure를 사용하여 새로운 사용자 인증 설정
# 예시)
# AWS Access Key ID [None]: AKIAEXAMPLEACCESSKEY
# AWS Secret Access Key [None]: wJalrXUtnFEMI/K7MDENG/bPxRfiCYEXAMPLEKEY
# Default region name [None]: ap-northeast-2
# Default output format [None]: json
# 새로운 사용자로 EKS 클러스터 연결 확인
aws eks list-clusters --region ap-northeast-2sungbin-user 를 생성한 뒤,
AccessKEyID, SecretAccessKey 를 발급 받았다

3. ECR 생성 및 설정
aws ecr create-repository --repository-name sungbin-app --region ap-northeast-2
- ECR Repository 목록 확인
aws ecr describe-repositories --region ap-northeast-2
- ECR 리포지토리 URI 확인
aws ecr describe-repositories --region ap-northeast-2 --query "repositories[*].repositoryUri" --output table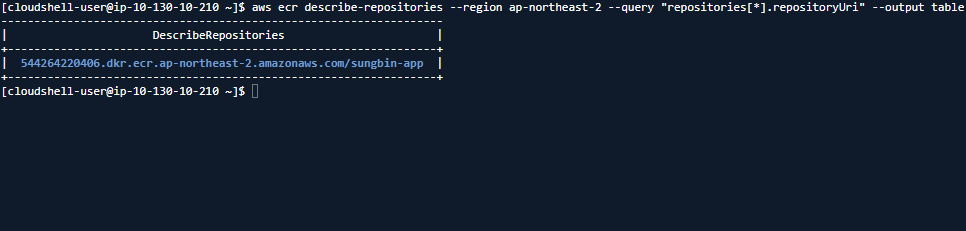
4. ECR 로그인 테스트
- docker 로그인 실행
aws ecr get-login-password --region ap-northeast-2 | docker login --username AWS --password-stdin 544264220406.dkr.ecr.ap-northeast-2.amazonaws.com-
- 위에서 얻은 패스워드와 ECR URI를 사용하여 Docker에 로그인
- ECR 로그인 성공하여 DOcker 이미지 Push 가능

- 현재 로그인한 사용자의 IAM 권한 확인
aws sts get-caller-identity
- IAM 사용자가 접근할 수 있도록 정책을 업데이트!!!!!!!!!!!!!!!!!!!!!!!
aws ecr set-repository-policy \
--repository-name sungbin-app \
--region ap-northeast-2 \
--policy-text '{
"Version": "2012-10-17",
"Statement": [
{
"Effect": "Allow",
"Principal": "*",
"Action": "ecr:*"
}
]
}'
5. Docker 이미지 빌드 & Push
- DockerFIle 생성
cd /home/cloudshell-user # 홈 디렉토리로 이동
vi Dockerfile # Dockerfile 생성- DockeFile 내용
# Nginx를 기본 이미지로 사용
FROM nginx:alpine
# 기본 인덱스 페이지 수정
RUN echo "<h1>Hello from Sungbin's EKS!</h1>" > /usr/share/nginx/html/index.html
# 컨테이너 실행 시 Nginx 실행
CMD ["nginx", "-g", "daemon off;"]
# 컨테이너가 80 포트에서 실행됨
EXPOSE 80- Docker 이미지 빌드
docker build -t sungbin-app .
- Docker Image 태깅
- ECR 에 푸시하려면, Docker 이미지를 ECR URI 와 동일한 이름으로 태깅해야 한다
docker tag sungbin-app:latest 544264220406.dkr.ecr.ap-northeast-2.amazonaws.com/sungbin-app:latest
- Docker 이미지 ECR 에 Push
docker push 544264220406.dkr.ecr.ap-northeast-2.amazonaws.com/sungbin-app:latest
- Upload 한 이미지 확인
aws ecr list-images --repository-name sungbin-app --region ap-northeast-2
6. GitHub Actions을 이용한 CI/CD 자동화
- GitHub Repository 에서 .github/workflows/deploy.yml 파일 생성

name: Deploy to EKS
on:
push:
branches:
- main # main 브랜치로 push될 때 실행
jobs:
build-and-deploy:
runs-on: ubuntu-latest
steps:
- name: Checkout Repository
uses: actions/checkout@v3
- name: Authenticate to AWS
uses: aws-actions/configure-aws-credentials@v1
with:
aws-region: ap-northeast-2
role-to-assume: arn:aws:iam::544264220406:role/GitHubActionsEKS # IAM Role 설정
- name: Login to Amazon ECR
run: |
aws ecr get-login-password --region ap-northeast-2 | docker login --username AWS --password-stdin 544264220406.dkr.ecr.ap-northeast-2.amazonaws.com
- name: Build and Push Docker Image
env:
ECR_REPOSITORY: sungbin-app
run: |
docker build -t $ECR_REPOSITORY:latest .
docker tag $ECR_REPOSITORY:latest 544264220406.dkr.ecr.ap-northeast-2.amazonaws.com/$ECR_REPOSITORY:latest
docker push 544264220406.dkr.ecr.ap-northeast-2.amazonaws.com/$ECR_REPOSITORY:latest
- name: Deploy to ArgoCD
run: |
argocd app sync sungbin-app- 하는 일
- GitHub 리포지토리의 최신 코드 가져오기
- AWS에 인증 (aws configure-aws-credentials)
- ECR 로그인
- Docker 이미지 빌드 & ECR에 Push
- ArgoCD를 통해 EKS 배포 자동화
7. ArgoCD 설정 (CD 자동화)
1️⃣ ArgoCD 설치
kubectl create namespace argocd
kubectl apply -n argocd -f https://raw.githubusercontent.com/argoproj/argo-cd/stable/manifests/install.yaml
kubectl get svc -n argocd
2️⃣ ArgoCD-server 서비스 변경
- LoadBalancer Type 으로 변경
kubectl patch svc argocd-server -n argocd -p '{"spec": {"type": "LoadBalancer"}}'- argocd-server 가 LoadBalancer Type 으로 변경 및 ExternalIP 부여됨을 확인

- 웹 페이지 확인

- 정보 조회 및 로그인
더보기

Username : admin
Password : kubectl -n argocd get secret argocd-initial-admin-secret -o jsonpath="{.data.password}" | base64 -d && echo

3️⃣ ArgoCD에 GitHub 연동
- argocd 최신 버전 확인 및 다운로드
# CLI 바이너리 다운로드
curl -sSL -o argocd-linux-amd64 https://github.com/argoproj/argo-cd/releases/latest/download/argocd-linux-amd64
# 실행 권한 부여
chmod +x argocd-linux-amd64
# 시스템 실행 가능한 경로로 이동
sudo mv argocd-linux-amd64 /usr/local/bin/argocd
# argocd CLI 버전 확인
argocd version --client- ArgoCD CLI 로그인 (자동화)
argocd login $(kubectl get svc argocd-server -n argocd -o jsonpath="{.status.loadBalancer.ingress[0].hostname}") \
--username admin \
--password $(kubectl -n argocd get secret argocd-initial-admin-secret -o jsonpath="{.data.password}" | base64 -d)

- git repository 등록
argocd repo add https://github.com/rookieboba/sungbin-eks-cicd.git --username <GITHUB_USERNAME> --password <GITHUB_TOKEN>
8. Kubernetes 애플리케이션 자동 배포 설정
1️⃣ GitOPS Application 생성 (ArgoCD 관리)
- Kubernetes 애플리케이션을 자동으로 배포하도록 설정
argocd app create sungbin-app \
--repo https://github.com/rookieboba/sungbin-eks-cicd.git \
--path manifests \
--dest-server https://kubernetes.default.svc \
--dest-namespace default \
--sync-policy automated \
--self-heal2️⃣ 애플리케이션 동기화 및 배포 확인
# 수동 동기화 (즉시 배포)
argocd app sync sungbin-app
# 애플리케이션 상태 확인
argocd app get sungbin-app
# 조회
argocd app list3️⃣ ArgoCD UI에서 애플리케이션 확인
🚀 이제 Git에 푸시하면 자동으로 배포되는 GitOps 기반 CI/CD 환경이 완성
LIST
'🔹 DevOps' 카테고리의 다른 글
| OpenSearch 또는 ECK 기반의 로깅 시스템 구축 및 고도화 (1) | 2025.02.17 |
|---|---|
| GitOps 작동 방식 (간단한 흐름) (1) | 2025.02.14 |
| AWS 3 Tier architecture / terraform 정리 (미완) (1) | 2025.02.06 |
| Ansible 사용 Ceph 설치 (0) | 2025.01.27 |
| Terraform 주요 명령어 정리 (0) | 2024.03.10 |