
🎯 목표
Rocky Linux 8.10 (가상 머신) 에서 최신 MariaDB를 설치하고, 실습용 DB/테이블 구성 뒤 마이그레이션 진행
| Step | 작업 내용 | 상태 |
| 0 | On-Premise MariaDB + 데이터 + binlog 설정 | ✅ 완료 |
| 1 | AWS RDS + VPC + Subnet + SG + Parameter Group | ✅ 완료 |
| 2 | IAM 역할 생성 (dms-vpc-role, dms-cloudwatch-logs-role) | ✅ 완료 |
| 3 | ✅ Replication Instance 생성 | ✅ 완료 |
| 4 | Source Endpoint 등록 (→ MariaDB 접속정보) | ✅ 완료 |
| 5 | Target Endpoint 등록 (→ RDS 접속정보) | ✅ 완료 |
| 6 | Replication Task 생성 (Full + CDC) | ✅ 완료 |
| 7 | Task 실행 및 상태 확인 | ✅ 완료 |
| 8 | RDS 데이터 확인 | ✅ 완료 |
[흐름]
[Insert on On-Prem DB] ---> [Binlog 기록됨] ---> [DMS Task가 읽음] ---> [RDS에 반영됨]
[인프라]
+------------------------+
| On-Premise (집 PC) |
|------------------------|
| OS: Rocky Linux 8.10 |
| DB: MariaDB 10.11.11 |
| IP: A.B.C.D |
| 포트: 3306 (open) |
| bind-address: 0.0.0.0 |
| 사용자: dms / dms123! |
|------------------------|
| [초기 데이터 구성] |
| DB 이름: dms_test |
| 테이블: customer |
| 내용: |
| - (1, 'southouse', 25)|
| - (2, 'rita', 21) |
| - (3, 'sony', 32) |
+------------------------+
|
| (Public Network)
v
+-------------------------+
| AWS DMS 구성 |
|-------------------------|
| SubnetGroup: OK |
| Replication Instance: OK|
| Source Endpoint: 설정 완료 |
| Target Endpoint: 설정 완료 |
| Task: Full Load Only |
+-------------------------+
|
v
+------------------------+
| AWS RDS (MySQL 8.0.35) |
|------------------------|
| DB 이름: dms_test |
| 사용자: sungbin |
| 포트: 3306 |
| 접근 허용 IP: ✅ 설정됨 |
+------------------------+
[비교]
- MGN은 서버 내부에서 AWS로 “보내는” 방식이라 공인 IP 없이도 OK
- DMS는 AWS에서 MariaDB로 “들어오는” 방식이라 외부에서 DB 접근 가능해야 함
[마이그레이션 목적 및 기대 결과]
- On-Premise의 `dms_test.customer` 테이블 전체 row를 AWS RDS(MySQL)에 복제
- Full Load 방식이므로, Task 실행 시점 기준으로 존재하는 모든 row가 복제되어야 함
- 복제 후 RDS에서 다음 row가 조회되기를 기대함:
| id | name | age |
|----|-----------|-----|
| 1 | southouse | 25 |
| 2 | rita | 21 |
| 3 | sony | 32 |[step 0] On-Premise
🛠️ MariaDB 10.11 설치 (공식 리포 자동 등록)
# 공식 리포지토리 등록
curl -LsS https://r.mariadb.com/downloads/mariadb_repo_setup | sudo bash -s -- --mariadb-server-version=10.11
# 캐시 재생성 후 MariaDB 설치
sudo dnf clean all
sudo dnf makecache
sudo dnf install -y MariaDB-server
# MariaDB 자동 시작 설정 및 실행
sudo systemctl enable --now mariadb
# 버전 확인
mysql --version🔐 root 비밀번호 설정 및 정상 확인
# 비밀번호 설정
sudo mysql -u root
# MariaDB 콘솔에서 암호 설정 및 확인
ALTER USER 'root'@'localhost' IDENTIFIED BY 'asdf';
FLUSH PRIVILEGES;
EXIT;
SELECT User, Host, plugin FROM mysql.user WHERE User='root';
SHOW GRANTS FOR 'root'@'localhost';🧱 DB 생성 / dms_test 데이터 구성
추후 아래 내용이, AWS 에서 조회되는 것이 목적
sudo mysql -u root -p <<EOF
CREATE DATABASE dms_test;
USE dms_test;
CREATE TABLE customer (
id INT PRIMARY KEY AUTO_INCREMENT,
name VARCHAR(50),
age INT
);
INSERT INTO customer (name, age) VALUES
('southouse', 25),
('rita', 21),
('sony', 32);
SELECT version();
SELECT * FROM customer;
EOF🔸 DMS가 접근할 수 있도록 MySQL 설정 변경
sudo tee -a /etc/my.cnf > /dev/null << 'EOF'
[mysqld]
bind-address=0.0.0.0
server-id=1
log_bin=mysql-bin
binlog_format=ROW
binlog_row_image=FULL
expire_logs_days=7
EOF🔸 재시작
systemctl restart mariadb🔸 설정 확인
mysql -u root -p -e "SHOW VARIABLES LIKE 'log_bin';"
mysql -u root -p -e "SHOW VARIABLES LIKE 'binlog_format';"🧑💻 DMS용 사용자 생성
# 접속 뒤 사용자 생성
mysql -u root -p <<EOF
CREATE USER 'dms'@'%' IDENTIFIED BY 'dms123!';
GRANT SELECT, RELOAD, REPLICATION CLIENT, REPLICATION SLAVE ON *.* TO 'dms'@'%';
FLUSH PRIVILEGES;
EOF
# 사용자 확인
mysql -u root -p -e "SELECT User, Host FROM mysql.user WHERE User = 'dms';"
[Step 1] AWS
✅ RDS, VPC, Subnet(2개), SubnetGroup, RouteTable, IGW, SecurityGroup, ParameterGroup 전부 포함
✅ 모든 리소스에 Name 태그 포함
✅ Multi-AZ 조건 충족
[0] 변수 정의
RDS_ID="dms-mysql-target"
RDS_USER="sungbin"
RDS_PASS="Asdf1234!" # ✅ RDS 비밀번호 정책 만족
RDS_ENGINE="mysql"
RDS_VERSION="8.0.35"
RDS_CLASS="db.t3.medium"
RDS_STORAGE=20
VPC_NAME="dms-vpc"
SUBNET_NAME1="dms-subnet-a"
SUBNET_NAME2="dms-subnet-c"
SUBNET_GROUP_NAME="dms-subnet-group"
PARAM_GROUP_NAME="dms-cdc-param-group"
SG_NAME="dms-mysql-sg"
SUBNET_AZ1="ap-northeast-2a"
SUBNET_AZ2="ap-northeast-2c"
MY_IP="$(curl -s https://checkip.amazonaws.com)/32"
[1] VPC + Subnet 2개 생성
VPC_ID=$(aws ec2 create-vpc \
--cidr-block 10.10.0.0/16 \
--tag-specifications "ResourceType=vpc,Tags=[{Key=Name,Value=$VPC_NAME}]" \
--query 'Vpc.VpcId' --output text)
aws ec2 modify-vpc-attribute --vpc-id "$VPC_ID" --enable-dns-hostnames "{\"Value\":true}"
SUBNET_ID1=$(aws ec2 create-subnet \
--vpc-id "$VPC_ID" --cidr-block 10.10.1.0/24 \
--availability-zone "$SUBNET_AZ1" \
--tag-specifications "ResourceType=subnet,Tags=[{Key=Name,Value=$SUBNET_NAME1}]" \
--query 'Subnet.SubnetId' --output text)
SUBNET_ID2=$(aws ec2 create-subnet \
--vpc-id "$VPC_ID" --cidr-block 10.10.2.0/24 \
--availability-zone "$SUBNET_AZ2" \
--tag-specifications "ResourceType=subnet,Tags=[{Key=Name,Value=$SUBNET_NAME2}]" \
--query 'Subnet.SubnetId' --output text)[2] Subnet Group 생성
aws rds create-db-subnet-group \
--db-subnet-group-name "$SUBNET_GROUP_NAME" \
--subnet-ids "$SUBNET_ID1" "$SUBNET_ID2" \
--db-subnet-group-description "Multi-AZ subnet group for DMS"[3] Internet Gateway + Route table 연결
IGW_ID=$(aws ec2 create-internet-gateway \
--tag-specifications "ResourceType=internet-gateway,Tags=[{Key=Name,Value=$VPC_NAME-igw}]" \
--query 'InternetGateway.InternetGatewayId' --output text)
aws ec2 attach-internet-gateway --internet-gateway-id "$IGW_ID" --vpc-id "$VPC_ID"
RT_ID=$(aws ec2 create-route-table \
--vpc-id "$VPC_ID" \
--tag-specifications "ResourceType=route-table,Tags=[{Key=Name,Value=$VPC_NAME-rt}]" \
--query 'RouteTable.RouteTableId' --output text)
aws ec2 create-route --route-table-id "$RT_ID" --destination-cidr-block 0.0.0.0/0 --gateway-id "$IGW_ID"
aws ec2 associate-route-table --route-table-id "$RT_ID" --subnet-id "$SUBNET_ID1"
aws ec2 associate-route-table --route-table-id "$RT_ID" --subnet-id "$SUBNET_ID2"[4] 보안 그룹 생성 (MySQL 접속 허용)
SG_ID=$(aws ec2 create-security-group \
--group-name "$SG_NAME" \
--description "Allow MySQL from on-prem" \
--vpc-id "$VPC_ID" \
--tag-specifications "ResourceType=security-group,Tags=[{Key=Name,Value=$SG_NAME}]" \
--query 'GroupId' --output text)
aws ec2 authorize-security-group-ingress \
--group-id "$SG_ID" \
--protocol tcp --port 3306 --cidr "$MY_IP"[5] 파라미터 그룹 생성 및 CDC 세팅
aws rds create-db-parameter-group \
--db-parameter-group-name "$PARAM_GROUP_NAME" \
--db-parameter-group-family "mysql8.0" \
--description "CDC for DMS"
aws rds modify-db-parameter-group \
--db-parameter-group-name "$PARAM_GROUP_NAME" \
--parameters \
"ParameterName=binlog_format,ParameterValue=ROW,ApplyMethod=immediate" \
"ParameterName=binlog_row_image,ParameterValue=FULL,ApplyMethod=immediate" \
"ParameterName=binlog_checksum,ParameterValue=NONE,ApplyMethod=immediate"
[6] RDS 인스턴스 생성
aws rds create-db-instance \
--db-instance-identifier "$RDS_ID" \
--db-instance-class "$RDS_CLASS" \
--engine "$RDS_ENGINE" \
--engine-version "$RDS_VERSION" \
--allocated-storage "$RDS_STORAGE" \
--master-username "$RDS_USER" \
--master-user-password "$RDS_PASS" \
--vpc-security-group-ids "$SG_ID" \
--db-subnet-group-name "$SUBNET_GROUP_NAME" \
--db-parameter-group-name "$PARAM_GROUP_NAME" \
--publicly-accessible \
--backup-retention-period 0 \
--no-multi-az \
--storage-type gp2 \
--port 3306
[Step 2] IAM Role 생성 및 추가
- dms-vpc-role 생성
aws iam create-role \
--role-name dms-vpc-role \
--assume-role-policy-document '{
"Version": "2012-10-17",
"Statement": [{
"Effect": "Allow",
"Principal": {
"Service": "dms.amazonaws.com"
},
"Action": "sts:AssumeRole"
}]
}'AmazonDMSVPCManagementRole / 정책 연결
aws iam attach-role-policy \
--role-name dms-vpc-role \
--policy-arn arn:aws:iam::aws:policy/service-role/AmazonDMSVPCManagementRole
- dms-cloudwatch-logs-role 생성
aws iam create-role \
--role-name dms-cloudwatch-logs-role \
--assume-role-policy-document '{
"Version": "2012-10-17",
"Statement": [{
"Effect": "Allow",
"Principal": {
"Service": "dms.amazonaws.com"
},
"Action": "sts:AssumeRole"
}]
}'AmazonDMSCloudWatchLogsRole / 정책 연결
aws iam attach-role-policy \
--role-name dms-cloudwatch-logs-role \
--policy-arn arn:aws:iam::aws:policy/service-role/AmazonDMSCloudWatchLogsRole
[etc] 역할 등록 확인
aws iam list-attached-role-policies --role-name dms-vpc-role
aws iam list-attached-role-policies --role-name dms-cloudwatch-logs-role[1~2] 분 뒤 재시도
🧠 DMS 구성 핵심 개념 정리
- Replication Instance: AWS에서 MariaDB 데이터를 복제하는 DMS 인스턴스(VM)
- Source Endpoint: 외부 Rocky 서버의 MariaDB 정보 (IP, 포트, 유저 등)
- Target Endpoint: AWS RDS(MySQL) 정보
- Replication Task: 어떤 데이터베이스/테이블을 어떻게 마이그레이션할지 정의 (예: 전체 + CDC)
- CDC (Change Data Capture): 변경된 데이터만 추적하여 복제하는 방식
[Step 3] Replication Instance 생성
[1] Replication Subnet Group 생성
aws dms create-replication-subnet-group \
--replication-subnet-group-identifier dms-subnet-group \
--replication-subnet-group-description "Subnet group for DMS" \
--subnet-ids "$SUBNET_ID1" "$SUBNET_ID2"[2] Replication Instance 생성
REPL_INSTANCE_ID="dms-repl-instance"
aws dms create-replication-instance \
--replication-instance-identifier "$REPL_INSTANCE_ID" \
--replication-instance-class dms.t3.medium \
--allocated-storage 50 \
--vpc-security-group-ids "$SG_ID" \
--replication-subnet-group-identifier "$SUBNET_GROUP_NAME" \
--publicly-accessible \
--tags Key=Name,Value="$REPL_INSTANCE_ID"- 상태 확인
aws dms describe-replication-instances \
> --query "ReplicationInstances[?ReplicationInstanceIdentifier=='dms-repl-instance'].{ID:ReplicationInstanceIdentifier, Status:ReplicationInstanceStatus, Endpoint:ReplicationInstancePrivateIpAddress}" \
> --output table- 시간이 매우 오래 걸림 (10분)

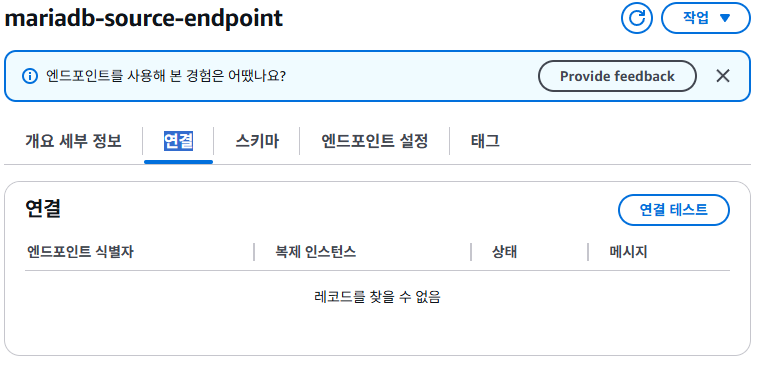
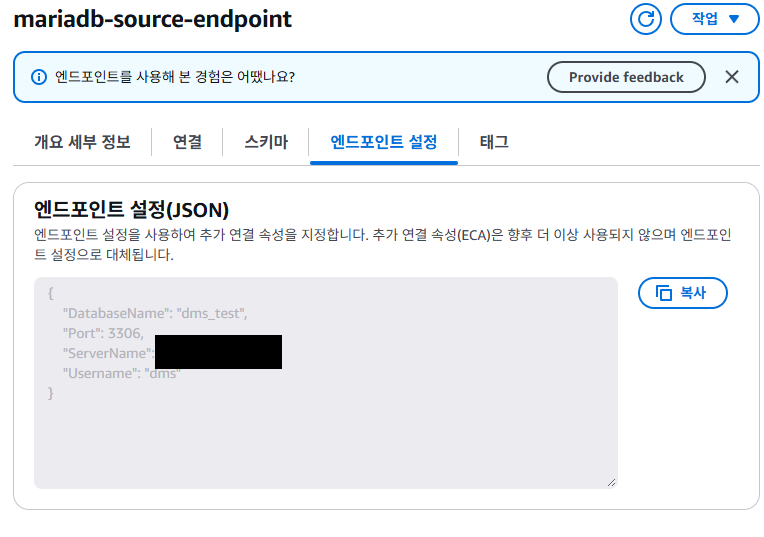
[Step 4] Source Endpoint (MariaDB)
aws dms create-endpoint \
--endpoint-identifier mariadb-source-endpoint \
--endpoint-type source \
--engine-name mariadb \
--username dms \
--password dms123! \
--server-name "${MY_IP%%/*}" \
--port 3306 \
--database-name dms_test \
--tags Key=Name,Value=mariadb-source-endpointDMS > 엔드포인트

[Step 5] Target Endpoint (RDS MySQL)
RDS_HOST=$(aws rds describe-db-instances \
--db-instance-identifier "$RDS_ID" \
--query "DBInstances[?DBInstanceIdentifier=='$RDS_ID'].Endpoint.Address | [0]" \
--output text)
aws dms create-endpoint \
--endpoint-identifier rds-target-endpoint \
--endpoint-type target \
--engine-name mysql \
--username "$RDS_USER" \
--password "$RDS_PASS" \
--server-name "$RDS_HOST" \
--port 3306 \
--database-name dms_test \
--tags Key=Name,Value=rds-target-endpoint
aws dms describe-endpoints \
--query "Endpoints[].{ID:EndpointIdentifier, Engine:EngineName, Type:EndpointType, Server:ServerName}" \
--output table
[Step 6] Replication Task 생성
mapping.json (테이블 전체 복제):
cat <<EOF > mapping.json
{
"rules": [
{
"rule-type": "selection",
"rule-id": "1",
"rule-name": "1",
"object-locator": {
"schema-name": "%",
"table-name": "%"
},
"rule-action": "include"
}
]
}
EOFsettings.json (기본 설정):
cat <<EOF > settings.json
{
"TargetMetadata": {
"TargetSchema": "",
"SupportLobs": true
},
"FullLoadSettings": {
"TargetTablePrepMode": "DROP_AND_CREATE",
"StopTaskCachedChangesApplied": false,
"StopTaskCachedChangesNotApplied": false
}
}
EOFReplication Task 생성 명령:
SOURCE_ARN=$(aws dms describe-endpoints \
--query "Endpoints[?EndpointIdentifier=='mariadb-source-endpoint-v2'].EndpointArn | [0]" \
--output text)
TARGET_ARN=$(aws dms describe-endpoints \
--query "Endpoints[?EndpointIdentifier=='rds-target-endpoint'].EndpointArn | [0]" \
--output text)
REPL_ARN=$(aws dms describe-replication-instances \
--query "ReplicationInstances[?ReplicationInstanceIdentifier=='dms-repl-instance'].ReplicationInstanceArn | [0]" \
--output text)
echo "SOURCE_ARN=$SOURCE_ARN"
echo "TARGET_ARN=$TARGET_ARN"
echo "REPL_ARN=$REPL_ARN"
MAPPINGS_PATH="$(pwd)/mapping.json"
SETTINGS_PATH="$(pwd)/settings.json"
aws dms create-replication-task \
--replication-task-identifier dms-full-cdc-task \
--source-endpoint-arn "$SOURCE_ARN" \
--target-endpoint-arn "$TARGET_ARN" \
--replication-instance-arn "$REPL_ARN" \
--migration-type cdc \
--table-mappings file://"$MAPPINGS_PATH" \
--replication-task-settings file://"$SETTINGS_PATH" \
--tags Key=Name,Value=dms-full-cdc-task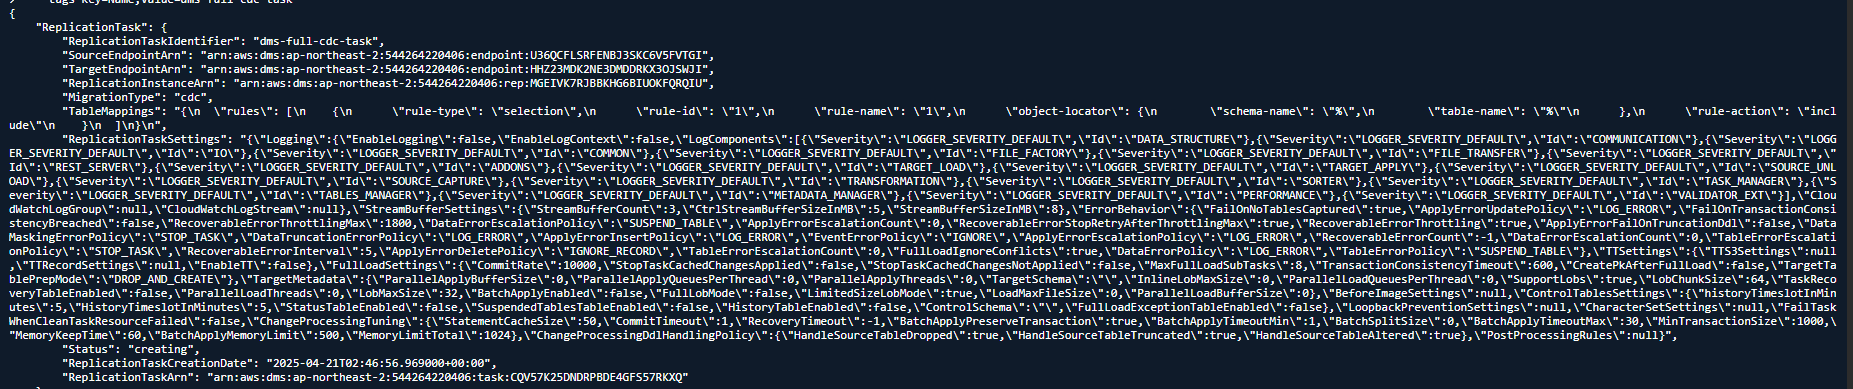

Replication Task 조회 명령어
aws dms describe-replication-tasks \
--query "ReplicationTasks[].{ID:ReplicationTaskIdentifier, Status:Status}" \
--output table
[Step 7] Task 실행
1) [RDS 대상 DB 사전 생성]
DMS Target Endpoint 연결 테스트 시, 지정된 DB(`dms_test`)가 존재하지 않으면 연결 실패가 발생함.
따라서 연결 테스트 전에 RDS(MySQL)에 직접 접속하여 `dms_test` 데이터베이스를 미리 생성함.
# [사전 작업] RDS에 대상 DB 생성
# 이유: DMS Endpoint 연결 테스트 시 지정된 DB가 존재해야 성공함
mysql -h dms-mysql-target.xxxxxx.ap-northeast-2.rds.amazonaws.com \
-P 3306 \
-u sungbin \
-p # 비밀번호: Asdf1234!
# 접속 후 쿼리
CREATE DATABASE dms_test;

2) 연결 테스트 수행 (source /target endpoint)
# 연결 테스트 실행
aws dms test-connection \
--replication-instance-arn "$REPL_ARN" \
--endpoint-arn "$SOURCE_ARN"
aws dms test-connection \
--replication-instance-arn "$REPL_ARN" \
--endpoint-arn "$TARGET_ARN"
# 테스트 결과 확인
# source endpoijt 결과 확인
aws dms describe-connections \
--filters "Name=endpoint-arn,Values=$SOURCE_ARN" \
--query "Connections[].{EndpointID:EndpointIdentifier, Status:Status, LastFailureMessage:LastFailureMessage}" \
--output table
# 타겟 엔드포인트 결과 확인
aws dms describe-connections \
--filters "Name=endpoint-arn,Values=$TARGET_ARN" \
--query "Connections[].{EndpointID:EndpointIdentifier, Status:Status, LastFailureMessage:LastFailureMessage}" \
--output table

3) start-replication-test
# Task 시작 방법
aws dms start-replication-task \
--replication-task-arn "$TASK_ARN" \
--start-replication-task-type resume-processing
4) TASK_ARN 변수 저장
aws dms describe-replication-tasks \
--query "ReplicationTasks[].{ID:ReplicationTaskIdentifier, ARN:ReplicationTaskArn}" \
--output table
TASK_ARN="arn:aws:dms:ap-northeast-2:544264220406:task:WEKSSBEXRNHV5N3YNUDGWRKTPI"
echo $TASK_ARN
[Step 8] RDS에서 결과 확인
mysql -h <RDS 엔드포인트 주소> -P 3306 -u sungbin -pUSE dms_test;
SELECT * FROM customer ORDER BY id ASC;
# SELECT * FROM dms_test.customer
[Step 9] CDC 반영 테스트
테스팅을 위해 On-premise 에서 새로운 데이터 삽입
- 현재 RDS / 기본 정보: Task ID, 타입, 상태 확인 조회 명령어
aws dms describe-replication-tasks \
--query "ReplicationTasks[?ReplicationTaskIdentifier=='dms-full-cdc-task'].{ID:ReplicationTaskIdentifier, Type:MigrationType, Status:Status}" \
--output table
On-Premise 로 이동 뒤 데이터 삽입해라.
CDC 의 경우, 반영이 1분까지 걸릴 수도 있다.
반영을 즉각적으로 안된다면,CloudWatch log 조회 혹은 Task 재시작
# Task 종료 방법
aws dms stop-replication-task --replication-task-arn "$TASK_ARN"
# sleep
sleep 5
# Task 시작 방법
aws dms start-replication-task \
--replication-task-arn "$TASK_ARN" \
--start-replication-task-type resume-processing
(참고)
binlog 설정 누락 / 사용자 권한 부족 / Transaction 미커밋 / 대상 테이블 누락 등이 있을 경우, 변경점이 반영이 되지 않는다
+ RDS의 binlog 설정은 수동 변경 불가하며,
+ Parameter Group을 통해 binlog_format, row_image 등을 설정해야 CDC가 작동합니다.

'☁️Cloud > AWS' 카테고리의 다른 글
| AWS MGN을 이용한 마이그레이션 (0) | 2025.03.16 |
|---|---|
| OVA 파일로 VMware → AWS 이전하기! EC2 마이그레이션 완전 정리 (0) | 2025.03.14 |
| AWS IAM Access Key 생성 가이드 (1) | 2025.03.14 |
| Auto Scaling 임계값(Threshold) 설정 기준 (0) | 2025.02.18 |
| AWS Distributed Load Testing (DLT) on AWS Fargate 상세 설정 방법 (1) | 2025.02.15 |